
Trying so as to add fonts to LibreOffice? We’ve talked earlier than about how LibreOffice is without doubt one of the very best Microsoft Phrase replacements and the way its open platform compares to others. One of many massive benefits is simply how adaptable it’s, it doesn’t matter what form of doc you’re engaged on or need to switch to the platform.
That extends to the fonts you utilize in LibreOffice to get simply the look you want. Let’s go over the fundamentals of including fonts, how you are able to do it, and find out how to alter your font choices.
The excellent news about utilizing fonts in LibreOffice
LibreOffice pulls from the identical fonts folder that working methods maintain for different packages like Microsoft Phrase. That makes managing fonts in LibreOffice a really simple course of. If in case you have downloaded font information previously, LibreOffice will possible discover them and embody them in its font record if you set up the app. If you wish to set up new fonts, the method is essentially the identical, so let’s get began!
The right way to add fonts for the LibreOffice app
This course of is actually the identical whether or not you might be utilizing Home windows or macOS. A few the names are barely totally different, however nothing complicated. Right here’s what to do.
Step 1: First off, discover and obtain the font you need. In case you are a searching for a selected font to match a beforehand revealed font or adhere to sure tips, it is best to be capable of Google its identify and discover a free obtain. Should you aren’t fairly positive what you need, you’ll be able to go to a website like FontGet, which has a bit to seek for LibreOffice fonts.
For now, we’re going to make use of the Caladea font for instance. Choose your font if you discover it, after which choose Obtain font for a free obtain. It will obtain a number of totally different variations of the font – you’ll want all of them for the italicized model, daring model, and many others.

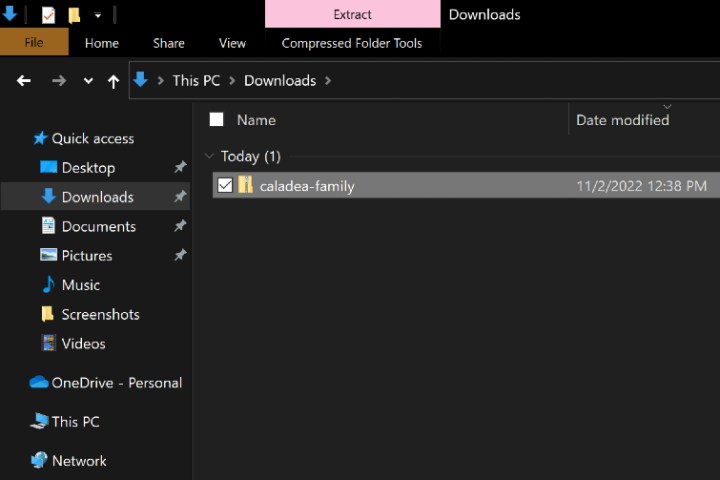
Step 2: The font group will obtain as a ZIP file in your native pc storage. Meaning the next step is to search out it and unzip it. Should you search your latest downloads, it is best to discover the ZIP file on the high. Choose it, and select Extract to unzip the information.
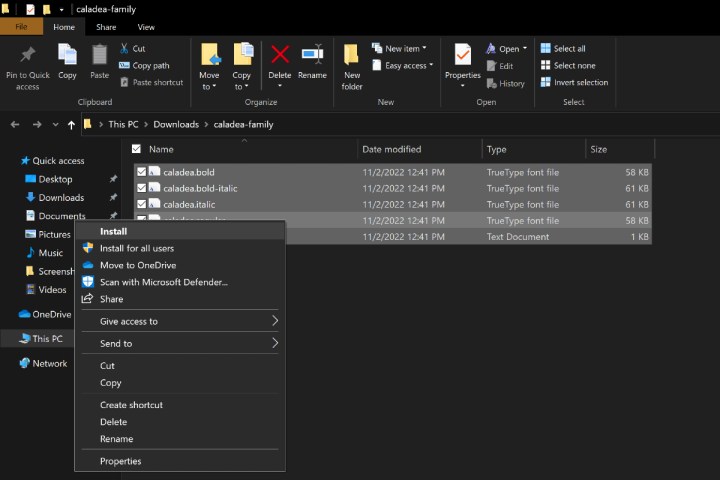
Step 3: A folder with the brand new font group will now obtain, however you aren’t executed but. Choose all of the fonts within the group. In Home windows, you’ll need to right-click and select Set up. In macOS, you’ll need to double-click as a substitute and select Set up Fonts within the new window that seems.
Generally at this level, you’ll want to verify that you just need to transfer ahead. So long as your fonts are from a good supply, this shouldn’t be an issue.
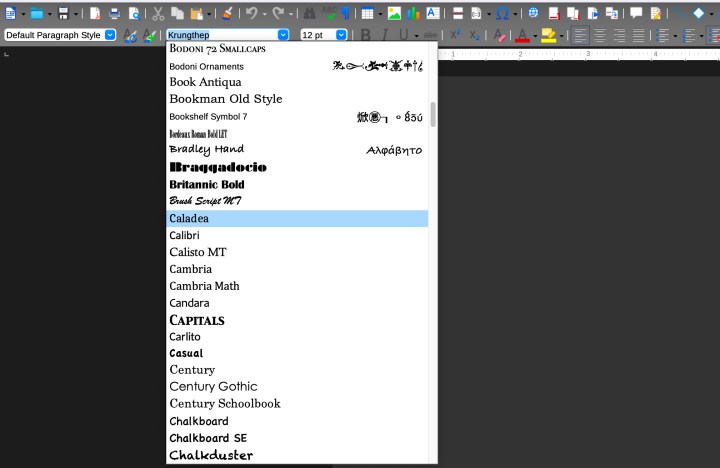
Step 4: The fonts will now obtain to the respective font folders in Home windows and macOS. Open LibreOffice, and choose your Fonts, and it is best to see it listed as an obtainable font.
Step 5: Downloading new fonts doesn’t at all times go easily. Generally the font doesn’t appear to be it ought to, or it received’t seem, or the file shall be reported as corrupted. LibreOffice provide wonderful compatibility, however there’s not at all times lots you are able to do about compatibility points. On Home windows, your choice is to go to the Fonts folder and delete that font group, then strive downloading from a greater supply or select a special font.
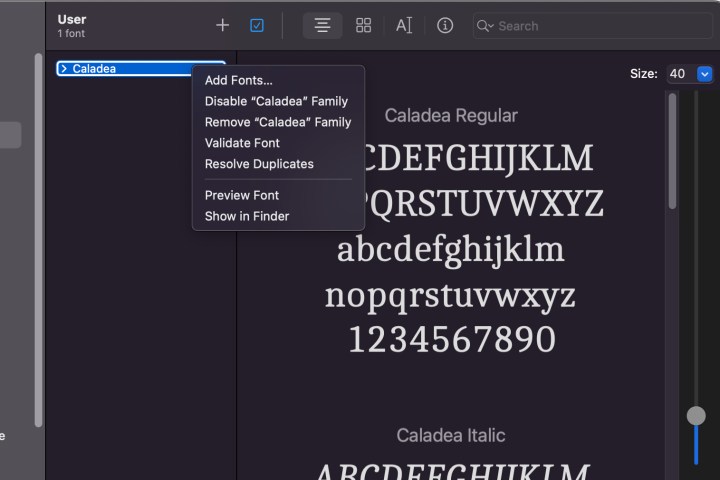
On macOS, you have got a pair extra choices. You’ll be able to go to the Font E-book app, then right-click your not too long ago downloaded font and select Validate to examine the font for any compatibility points. It’s also possible to select Resolve duplicates if LibreOffice is getting confused between two font choices.
On the lookout for extra details about putting in new fonts? Take a look at our information on find out how to set up fonts on Home windows 11, too.
Editors’ Suggestions
