
Hyperlink’s a reasonably modern man. However he additionally has quite a lot of wants from his threads past simply wanting nice: elevated defenses, the power to face up to excessive temperatures, and now that he’s taken to jumpin’ off islands within the sky like a madman, having elevated aerial maneuvers is fairly vital too.
So which threads are the perfect for assembly these wants and the place you’ll find them? We’ve taken a take a look at a wide range of completely different situations you’re prone to encounter in Tears of the Kingdom and have chosen the perfect units to collect for sure makes use of. As Tears of the Kingdom is a sport with a variety of freedom in the way you play it, you may discover completely different units extra helpful than others, however these are all dependable, go-to units for his or her functions.
For Higher Flying: Glide Armor Set
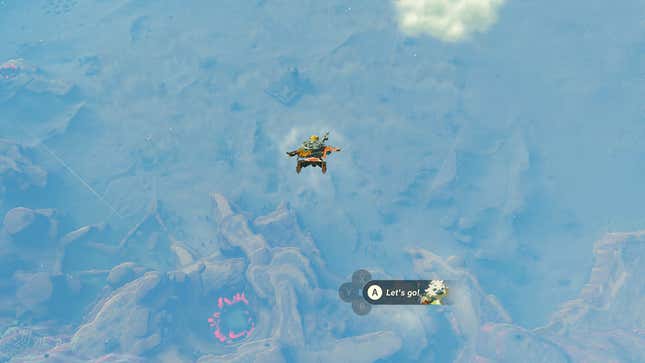
Sky Islands are in every single place in Hyrule as of late. And Hyperlink’s again along with his paraglider from Breath of the Wild. Leaping off of islands and getting shot up via skyview towers means you’ll be spending a good bit of time within the air. That’s all of the extra cause it’s best to seize the Glide armor set.
Learn Extra: Tears of the Kingdom’s Glide Set Makes Flying Approach Higher
We have now a full information devoted to discovering the glide set. When you assemble all of the items, your stamina will lower at a slower charge whereas paragliding, and also you’ll have dramatically higher aerial maneuverability.
For Higher Sneaking: Stealth Set
For the foxiest of the foxes, you’ll need to contemplate choosing up the Stealth armor set. These items will enhance your stealth and in case you max out the armor upgrades, you’ll transfer sooner at evening.
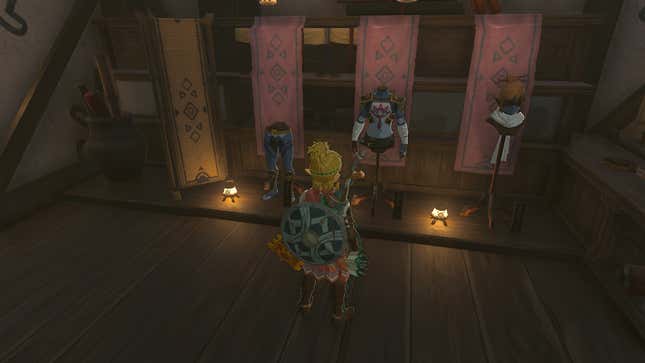
You’ll discover the Stealth set on the market in Kakariko Village. We have now a full information on how one can get to Kakariko whereas benefiting from your journey. The stealth set is out there on the armor store…but it surely’s kinda dear. Like, 5,000 rupees dear.
Learn Extra: Tears of the Kingdom: What’s Value Doing On The Approach To Kakariko Village
However there’s a cause for this dramatic markup. Seems the proprietor’s grandmother is sick with the Gloom-borne Sickness. Head on over to the east facet of the village to talk with Lasli (she’s seated close to a hearth) to start out the “Gloom-borne Sickness” quest. Ending that quest will decrease the value of the Stealth armor right down to 500 for the masks, 600 for the tights, and 600 for the shirt.
For Enemy Intel: Champion’s Leathers
The Champion’s armor set is fairly useful for many who get pleasure from having the sting in fight. This set will show your opponents’ full HP in numbers. However you’ll have to embark on a facet quest to get this one.
Learn Extra: You Need Tears of the Kingdom’s Champion’s Leathers For the Juicy Enemy Information
We have now a full information on how one can get the Champion’s Leathers in Tears of the Kingdom. Because you’ll have to get to Hyrule Fortress for this quest, I like to recommend grabbing the Glide Armor set, earlier than you do.
For Stronger Assaults: Barbarian Armor Set
What in case you simply need to up your injury? I imply, these bokoblins aren’t gonna slaughter themselves, ya know. Fear not, the Barbarian Armor set is a superb strategy to up your assault energy, and you will get the chest piece fairly darn early on within the sport.
To snag it, head on over to the Crenel Hills Cave, which is throughout the river northeast of Lookout Touchdown. Be careful for the Stone Talus inside, although utilizing your powers, you’d be stunned at how simple you may defeat them.
Learn Extra: Tears of the Kingdom: Gamers Are Discovering Superb Methods to Cheese Bosses
Enterprise additional into the cave, searching for a bit of glowing ore lodged right into a excessive a part of the far wall from the place you got here in. Destroy it with a bomb-fruit-fused arrow, then climb on as much as get the Barbarian Armor.
To seize the Barbarian Helm, head southeast of Kakariko Village.You’re searching for Robred Dropoff Cave. You’ll know you’re in the correct place whenever you see a bunch of spooky-lookin’ statues. Enter the cave and take your first proper. Then as you enter the following space, smash via the rock wall to your left. It’s in between the open path and one other rock wall. Proceed ahead and also you’ll get right into a battle with some bokoblins. Take ‘em out after which blow up the rock flooring within the heart of this chamber. Soar via into the lake under, then proceed down the trail till you arrive at three platforms with statues. Select the rightmost one and ascend to the highest. You’ll arrive within the chamber with the helm.
For the Barbarian Leg Wraps, head to the Walnot Mountain Collapse East Necluda. The cave is simply gently southeast of the Retsam Forest, on the underside of the southwest facet of Walnot Mountain, and it has two entrances, one north, one south. As soon as inside, get to the higher degree. Round halfway via the cave, you’ll spot an Ice Like hanging from the ceiling, and simply past that you simply’ll see an alcove. Soar as much as this space and also you’’ll discover the leg wraps simply behind some frozen ice. Use something explosive or scorching to cope with it.
To Glow within the Darkish: Miner’s Armor
The Miner’s Armor is fairly important for voyaging into the depths of Hyrule. It makes you glow, in any case. And in case you improve the armor, you’ll primarily go away glowing footprints behind you.
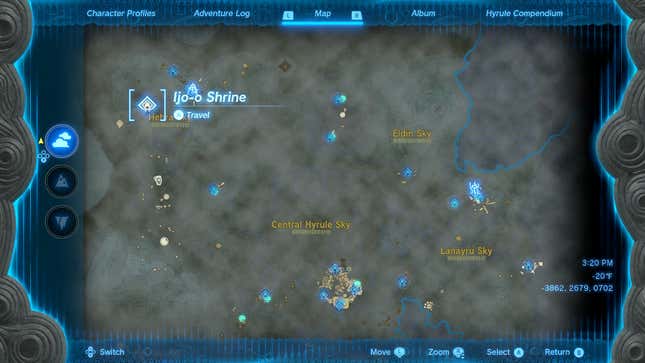
This is among the armor units you’ll find treasure maps for. These will mark an X in your map, main you instantly to search out every bit. To accumulate the primary map, head on as much as the West Hebra Sky Archipelago, to the set of islands with the Ijo-o Shrine. A straightforward strategy to get there’s to launch your self from the Rospro Go Skyview Tower and look to the islands simply barely northwest. You’ll discover all of the maps in treasure chests. The primary is discovered on the north-most square-shaped mini isle.
The second a part of the map is discovered after defeating a Flux Assemble 1 simply south of the place you discovered the map for the primary half. Strictly talking, all you might want to do is dislodge the chest from the boss to seize this map.
Lastly, go to the northwest-most extension from Rising Island Chain. This Sky Island hovers simply above Hevra Peak. You will get there both by launching your self from the Rospro Go Skyview Tower or the Pikida Stonegrove Skyview Tower. When you land on this island, head simply past the Kahatanaum shrine, and also you’ll discover the ultimate map.
Every of those maps will ship you down into the depths, so be ready for some spelunking.
To climb moist surfaces: Froggy Set
The Froggy Armor set is especially useful for climbing within the rain, because it’ll forestall you from slipping. You’ll earn this set as part of the Fortunate Clover Gazette sidequest, which we now have a full information for.
Learn Extra: Tears of the Kingdom’s Information Paper Quest is One in every of ts Greatest

This can be a significantly helpful quest to wrap up as it should unlock the Nice Fairies, who can enhance your armor units to make them more practical. You’ll want to go to each steady in Hyrule and full every portion of the Fortunate Clover Gazette quest to accumulate the complete set of armor, however you’ll earn items little by little, getting one every after your fourth, ninth, and twelfth adventures.
To not freeze to demise: Snowquill Armor
Have you ever been to Rito Village these days? Place is getting hit by some unusually chilly climate. However that’s no sweat for you in case you’ve received the Snowquill Armor.
Certain, you completely can simply cook dinner up some peppers and proceed to eat these to energy via the chilly, however the Snowquill Armor, purchasable in Rito Village, makes all of that irrelevant. Simply toss it on and go stomping round within the snow.
Learn Extra: That is the Greatest Order to Play Tears of the Kingdom’s Temples Primarily based on Their Rewards
We suggest going to the Wind Temple first for the primary quests, which necessitates heading to Rito Village. Simply head on as much as the armor store there and also you’ll have the ability to purchase the shirt for 500 rupees, the headdress for 650, and the trousers for 1,000.
To not die of a warmth stroke: Desert Voe Armor
In Hyperlink’s journey throughout Hyrule, he’ll come throughout some significantly sweaty environments. It pays to search out some armor that may enable you sit back a bit in these brutally scorching climates.
To start out, head to the Kara Kara Bazaar in Gerudo, all the way in which to the southwest area of the map. Right here you will get the Desert Voe Headband for 450 rupees. You then’ll have to get to Gerudo City which, given the sandstorm, may be just a little difficult.
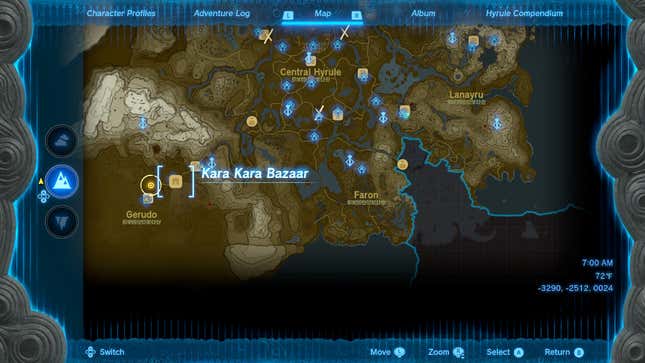
When you haven’t discovered Gerudo City but, it’s on the very finish of the trail main southwest. When you have the Glide armor, one strategy to get there’s to get your self some top through a close-by Sky Tower or by leaping from a Sky Island shut by. Paraglide or use another fancy trick like a Zonai Wing or that Air Bike everybody loves, to get to Gerudo City a lot simpler.
When you’re on the town, be careful for the creepy gibdos that’ll assault you (they are often robust in case you’re not significantly nicely geared up). Then search for a gap within the floor on the east facet of city. Soar down there and in your left you’ll discover some smashable rocks. Use a rock-fused weapon or another technique to start out smashing your method via. The hallway will lengthen towards a bend to the left, adopted by an elevated space you’ll have to climb. Hop up there, smash via the rocks, after which after one other bend left, you’ll discover some stone pillars. Use Ascend right here to enter the Gerudo Secret Membership.
As soon as contained in the membership, you’ll have the ability to buy the Desert Voe Spaulder for 1300 and the Desert Voe Trousers for 650.
To be the perfect swimmer: The Zora Armor
Whilst you’ll get the Zora Armor chest piece, which helps you to swim up waterfalls, throughout the “Sidon of the Zora” major quest, you’ll have to seek for the remaining items. These will enhance your swimming talents and provide the means to assault whereas within the water.
When you full “Sidon of the Zora,” which is one of many major temple quests, return and communicate to Yona, who initially made the chest piece for you. This may kick off the “Token of Friendship” quest, which can ship you to the Historic Zora Waterworks (which you visited throughout the “Sidon of the Zora” quest). You could find Yona in Zora’s Area this time.
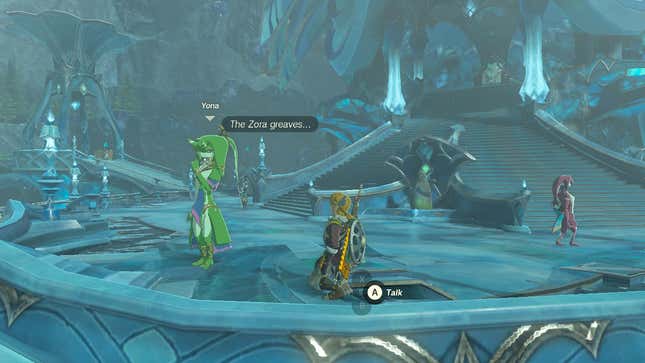
Enterprise via the Waterworks (dive on in via the whirlpool simply as you probably did throughout the “Sidon of the Zora” quest), and down there you’ll discover a large gap within the floor. Enter there and prepare for a battle with a Stone Talus. Strictly talking, you don’t must battle it. Simply head for the waterfall and behind it you’ll discover a chest with the Zora Greaves.
To get the helm, you’ll want to return to the fish-shaped Sky Island you visited throughout “Sidon of the Zora.” On the southeast nook of the island, you may spot a gap within the facet; soar over and paraglide into it to get the helm.
To climb like no different Hylian: Climbing Armor
That boy positive does like to climb. Because you’ll spend fairly a little bit of time pulling your self up mountains and cliffs and the like, why not contemplate grabbing an armor set that’ll enhance Hyperlink’s climbing talents? Climber’s Armor will do exactly that.
To get this armor, first go to the Upland Zorana Byroad cave to the west of Zora’s Area. Inside, persist with the right-most path. You’ll have to blow via the vines with a bomb-fruit-fused arrow. Past the vines, you’ll discover a room you may flood by lifting a door on the alternative facet. Search for the archway beneath the staircase. In there, you’ll discover the Climbing Boots.
For the Bandana, head to the Ploymus Mountain cave. It’ll be east of Zora’s Area, however West of Mipha Courtroom. Discover the cave to search out the bandana (I like to recommend having the Froggy armor geared up as surfaces in right here might be somewhat slippery).
For the Climbing Gear shirt, head to the North Hyrule Plain Cave, which is southeast of New Serenne Secure. Combat your method via the Horriblins and Like Likes. Push via, bearing left till you see a waterfall spilling right into a tiny lake. Soar in and swim throughout, go previous the waterfall and also you’ll discover the Climbing Gear.
To tackle essentially the most injury: Soldier’s Armor Set
So how about boosting your protection? Properly, the Soldier’s Armor is among the finest within the sport for that very goal. Head on over to Hyrule Fortress to get began piecing it collectively. However ensure you convey as many explosives and rock-fused weapons as you may, as a result of we’re gonna have to dig.
Go the gate and begin strolling up the ramp till you get to a doorway with lifeless bushes on both facet. Ultrahand the 2 gates inside to get via, then flip proper. The subsequent room will function two Horriblins. Combat them or simply transfer into the room to the correct, up a flight of stairs to the Commentary Room. Open the grate with Ultrahand and drop down.
Go down the spiral staircase and filter the rockwall on the backside. Push ahead until you get to a lifeless finish with glowing ore. Destroy that ore and drop down.
Ignore the Like Like right here in case you’d…like. And smash via the rock wall to the south of this room (in case you see a Bubbulfrog in your method, you’re going within the fallacious route). When you’re via right here, push ahead till you drop down to search out two rock partitions, one orange, the opposite blue. Destroy the orange one and push right into a jail cell the place you’ll battle some bokoblin skeletons.
Then, transfer the boulder in one of many cells with Ultrahand and drop down. Ascend simply earlier than the opening within the ceiling to get into the locked cell with the bokoblin skeleton. Kill them and open the chest to get the Soldier’s Armor.
However we’re not carried out but. Return the way in which you got here to that wall of blue rubble. Clear via it with a rock weapon, then push via to clear yet one more blue rubble wall the identical method. As soon as on this massive chamber, swim to your left and filter the rocks blocking the archway. Right here you’ll discover one other jail cell, this time with an Ice Like. Kill it and seize the Soldier’s helm from a chest to the left.
Lastly, the greaves. Depart the chamber with the helm and swim to your left. Hold following the trail because it bends left and also you attain extra blue rocks to filter. Destroy these and transfer throughout a land bridge the place a skeleton moblin and bokoblin can be ready to greet you. Cope with them as you please after which filter yet one more (uninterested in this but?) blue rock wall.
You’ll come to a chamber with two small stone taluses. Kill them and, yup, filter extra rocks. This time it’s a giant pile to your proper as you stroll in. This may take you to a different jail cell with a small stone talus and on the left, a Like Like. Combat them or simply seize the chest within the leftmost room with the greaves and ascend out of there in case you don’t need to cope with the nonsense. And voila, you’ll have all the items of the Soldier’s Armor.
There are numerous completely different units of armor in Tears of the Kingdom, however by overlaying the fundamentals and seeking out ones that’ll assist you within the stuff you do most, you’ll end up geared up for nearly any scenario.
