
Eureka Orthos is the model new Deep Dungeon added in 6.35, becoming a member of the likes of Palace of the Lifeless and Heaven-on-high. In comparison with its predecessors, it’s a spike up in problem anticipated from endgame content material with equally profitable doable rewards and extra Allagan lore. Who doesn’t love extra horrifying Allagan lore by this level within the recreation’s story? So seize your folks, get together up, and put together to step on some traps and giggle at one another. Right here’s an in-depth Eureka Orthos Flooring 1-30 Information.
Eureka Orthos: Begin and preparation
To unlock Eureka Orthos, the character you’re enjoying should clear flooring 50 of Palace of the Lifeless and have completed base Endwalker. The beginning quest is ‘Delve into Delusion’ from Koh Rabntah in Mor Dhona (21.6, 8.1). It’s a reasonably quick beginning quest with just a few cutscenes that takes you to the Eight Sentinels. Observe which you could teleport to the Eight Sentinels by talking to Burnel (21.6, 8.1) the place Koh was anytime after this.

Screenshot by PC Invasion
Eureka Orthos mechanics overview and common recommendation
Eureka Orthos capabilities principally identically to Palace of the Lifeless, moreover just a few new mechanics and being more durable general. Gamers begin at stage 81 and can stage as much as 90, however will obtain EXP out of the Deep Dungeon upon finishing an obligation inside it as effectively. This implies all common recommendation and guidelines which applies to Palace of the Lifeless apply to Eureka Orthos as effectively. As much as 4 gamers can enter with any get together composition. You possibly can go in with a set get together when you’ve got one already, or matched if you wish to be randomly paired with others.
You queue for situations in teams of 10. For Eureka Orthos, it’s flooring 1-10, 11-20, and 21-30 to clear all the base Deep Dungeon as in comparison with Palace of the Lifeless’s 50 flooring. Past flooring 30 is usually only a problem run. Should you enter with a set get together, it’s essential to proceed via till flooring 30 with the identical get together.
Traversing the flooring
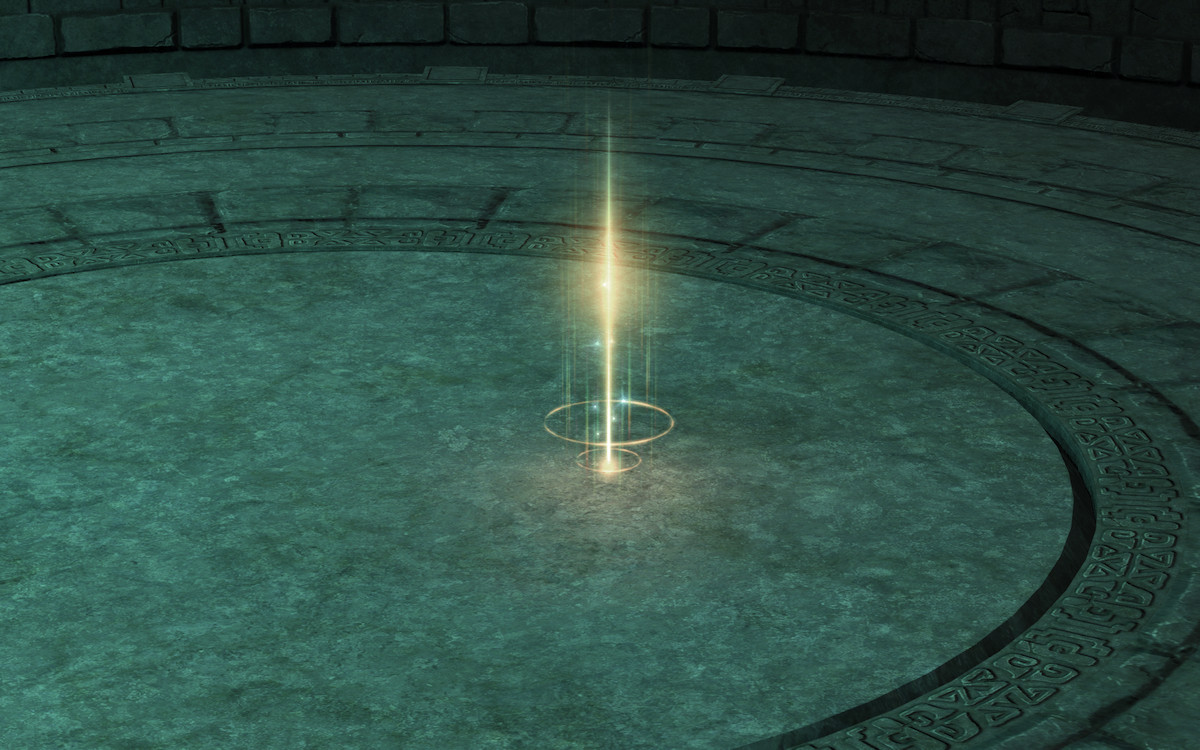
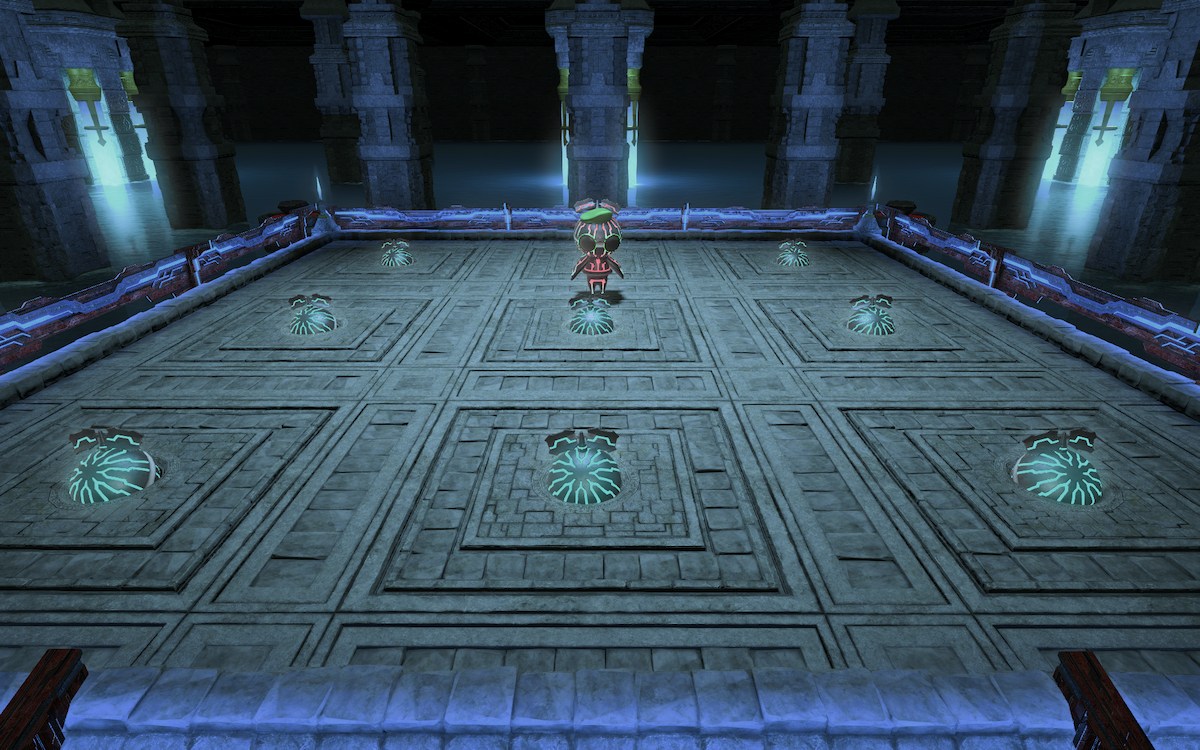
Every flooring is a randomly generated map format with enemies, treasure coffers, and two pylons. Your goal is to combat via sufficient enemies for the Pylon of Passage (represented by a key on the map) to activate, upon which all get together members stand in it to move the get together to the following flooring.
Gear merchandise stage doesn’t matter in Eureka Orthos. As an alternative, you’ve gotten an Orthos Aetherpool Arm, altering your weapon to an Allagan themed one, and Orthos Aetherpool Armor. These act as your weapon and kit merchandise ranges throughout all jobs.
Every flooring will randomly spawn gold, silver (blue with silver accents), and bronze (nearer to black) treasure coffers. Gold provides you Protomanders, silver will increase your Aetherpool power (if it’s not already at max for the ground) or provides a Demiclone, and bronze provides prime quality Hyper-potions or Phoenix Downs.
If somebody dies and the get together doesn’t have a job that may resurrect, the Pylon of Return (represented by a three-leafed plantlike image on the map) prompts after you kill sufficient enemies, permitting all fallen get together members to resurrect when interacted with.
Traps and Enchantments
There are additionally traps. Most spawn on the ground, however some set off once you open a treasure coffer:
- Landmine explodes on gamers inside vary, taking down an enormous chunk of well being.
- Enfeebling inflicts the Enervation debuff, lowering injury dealt and rising injury taken.
- Owlet turns you into an owlet, unable to execute actions for 30 seconds.
- Luring spawns three enemies without delay across the participant. That is in all probability the single-handedly most harmful entice, because it’s straightforward to get overwhelmed.
- Impeding afflicts all who step on it with Pacification and Silence at 30 seconds every, rendering you just about ineffective to assault. It may be Esuna’d away.
A entice revealed by a Protomander of Sight, on this case an Enfeebling. Screenshot by PC Invasion
Observe the traps additionally have an effect on enemies in vary if stepped on. This will typically be an sudden boon.
With every new flooring comes the prospect of a floor-wide enchantment occurring, lasting till the following flooring:
- Talents Unavailable: Can’t use any job motion labeled as a capability.
- Blinded: Accuracy is lowered, giving assaults extra of an opportunity to overlook.
- Objects Unavailable: No Protomanders or stock gadgets can be utilized besides Serenity.
- Gloom: The ground beneficial properties a sickly pink mist. Enemy motion pace and injury are elevated, whereas injury taken is decreased.
- HP Lower: Most HP is decreased by 20%.
- Haste Granted: Provides all gamers the Haste buff, lowering the time it takes to make use of assaults. Particularly invaluable for casters.
- No therapeutic: HP doesn’t regenerate out of fight. Works nice with the Storms Protomander.
- HP/MP Most Improve: Most HP and MP are elevated.
- Knockback Disabled: Assaults that trigger knockback not do. This implies X and X are not as efficient.
- Harm Decreased: Harm dealt by all get together members is decreased.
- Dash Penalty: You possibly can’t use dash.
Protomanders
Principally similar to Palace of the Lifeless with just a few adjustments, Protomanders can be utilized within the dungeon by any get together member with quite a lot of helpful results. The get together can carry three of every. The total listing of Protomanders is as follows:
- Affluence: Will increase the variety of treasure coffers on the following flooring.
- Fortune: Will increase the prospect enemies on the present flooring drop treasure coffers.
- Flight: Decreases the variety of enemies on the following flooring.
- Security: Removes all traps from the present flooring.
- Energy: Will increase injury dealt and HP restoration through therapeutic magic by 30% for eight minutes. Solely applies to who makes use of it.
- Instinct: Appraises the present flooring for the Accursed Hoard. Carries over to the following flooring if it doesn’t detect it.
- Metal: Decreases injury obtained by 40% for eight minutes. Solely applies to who makes use of it.
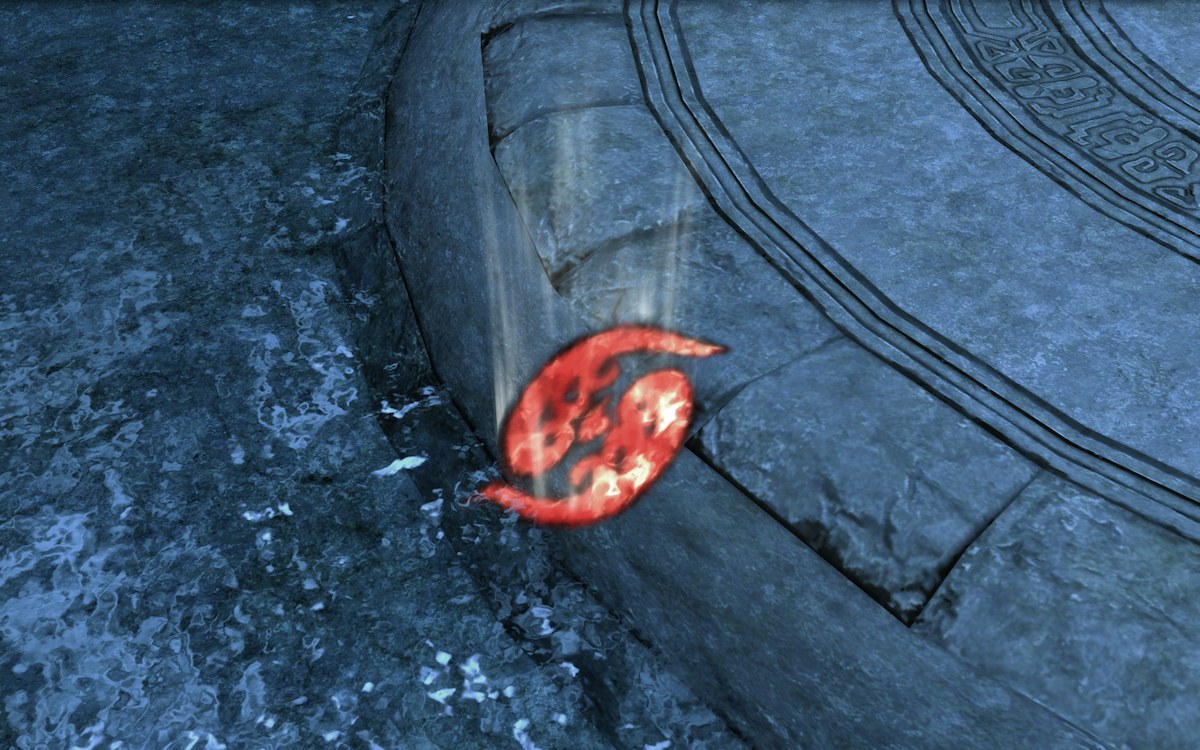
- Sight: Reveals the present flooring’s map and the placement of all hidden traps. Revealed traps present up as glowing red-orange marks on the ground relying on entice sort.
- Witching: Transforms all targets inside vary (roughly inside a room’s radius) right into a frog, imp, or hen for 30 seconds. This removes all of their actions and makes them simpler to kill.
- Serenity: Removes all enchantments from the present flooring.
- Purity: Removes the Pox standing impact from the consumer.
- Storms: Reduces the HP of all enemies on the present flooring to a single digit. These not in fight will regenerate HP.
- Dread: Transforms consumer right into a Dreadnaught, permitting the participant to 1 shot enemies or apply Vulnerability stacks.
- Elevating: Raises the primary get together member to be KOed.
- Alteration: Adjustments an enemy occupying a random room on the following flooring right into a mimic or mandragora.
- Lethargy: Slows all enemies on the present flooring. This doesn’t apply to ones spawning after use.
Demiclones
Eureka Orthos provides Demiclone Protomanders as a brand new mechanic. Demiclones spawn an NPC who will provide help to combat for a whole flooring. The Demiclones doable for retrieval are:
- Unei, who fights as an earlier model of White Mage with entry to Stoneskin, acts as a defend and absorbs injury. She casts Stoneskin on different gamers and heals. She additionally casts Windburn on enemies for injury over time.
- Doga, who fights as a Black Mage with very robust assaults. He casts 15 second Electrocution DoTs and petrifies enemies.
- Onion Knight, who fights as a Paladin. Has the strongest assaults of the three and likewise casts Onion Treatment when get together members are low on HP.
The Demiclone is tied to the participant who summons it. They observe that participant, and if that participant dies, the Demiclone disappears.
The Accursed Hoard
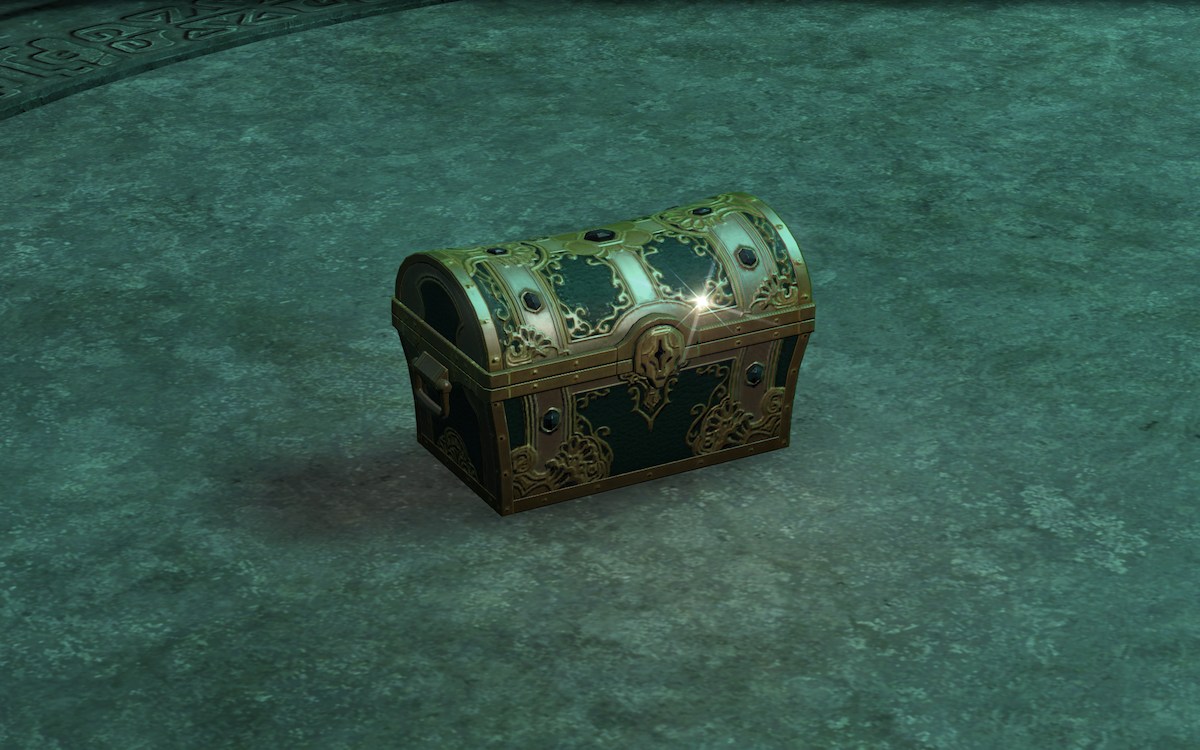
Every flooring has an opportunity for a bit of the Accursed Hoard to look. This manifests as a Banded Treasure Coffer, showing to the participant in the event that they step in its radius. Upon leaving an occasion of Eureka Orthos, Accursed Hoard items flip into trimmed sacks, containing a big number of gadgets similar to Confetti, Minions, Barding, and Glamour gadgets, a few of that are uncommon and costly.
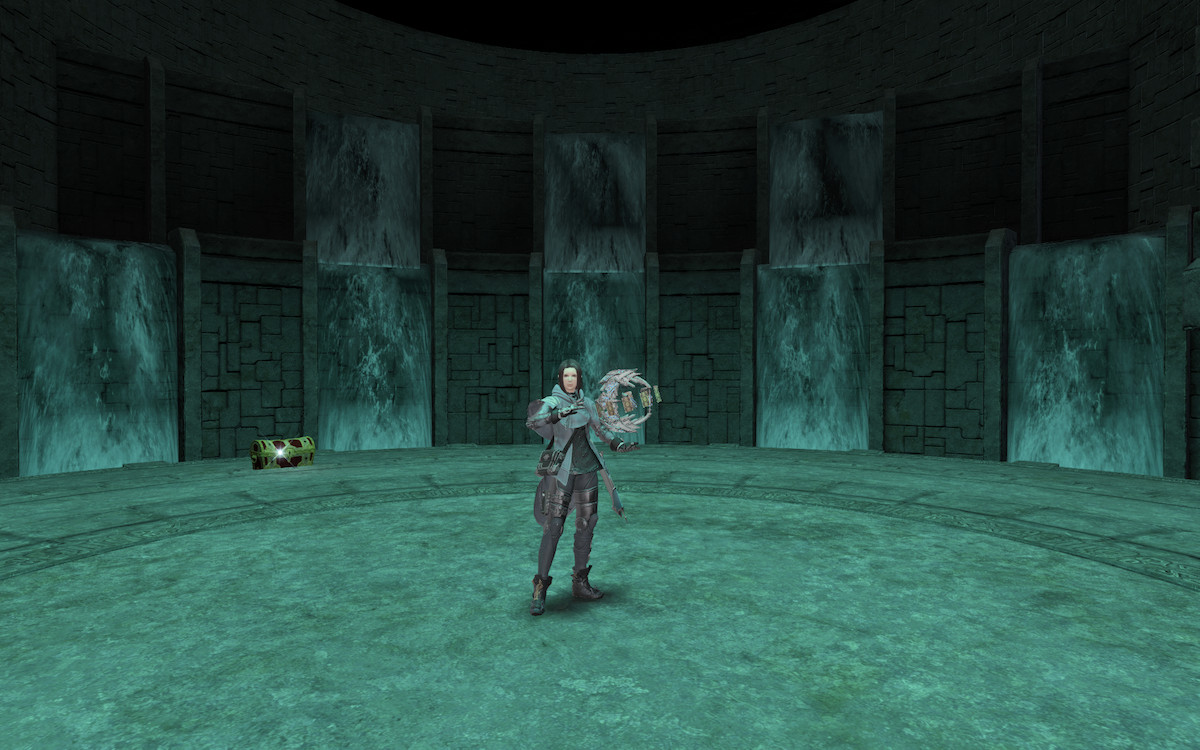
To make gathering Accursed Hoard items simpler, Protomanders of Instinct are your buddy. Utilizing one will inform you if there are any items of the hoard in your flooring. You’ll see a glowing little ray of sunshine to point the place one is. Stand in it to disclose a coffer.
-
- The glow and subsequent coffer.
-
- Screenshots by PC Invasion
Common Recommendation
- Whilst you can go in with any mixture, the usual get together composition or three DPS and a healer is perfect. You want Esuna rather a lot, and stun additionally turns out to be useful. Many AoE assaults can solely be survived by a tank if in any respect.
- Watch out opening bronze chests. They’re the one form that spawns a Mimic on these flooring. Should you encounter one, pop a Protomander of Witching instantly. Should you don’t have Witching, Lethargy or Storms might prevent from Pox. Failing that, a transfer that inflicts stun might assist prevent. Pox lasts 9 minutes and prevents you from regenerating HP naturally whereas slowly dealing injury.
- By no means crowd a treasure coffer, it might be trapped.
- All the time be cautious of traps as you navigate, as the identical ones from Palace of the Lifeless are all right here. Luring traps nonetheless spawn many enemies without delay and are finest handled by Storms, Witching, or Lethargy. The X entice turns you into an owlet as a substitute of a frog. Landmine traps nonetheless explode on you. X traps nonetheless produce silencing/x
- Keep on with the sting of rooms. Flooring traps are much less more likely to be on the sting.
- Be cautious about utilizing AoE assaults, particularly these like White Mage’s Assize or Astrologian’s Stellar Explosion, or Lord of Crowns. It’s very straightforward to by chance pull in additional enemies than you wish to take care of at a time.
- On boss flooring, make the most of Metal, Energy, Dread, and Elevating Protomanders, in addition to Demiclones, particularly Unei. Her Stoneskin is extremely invaluable to surviving the boss combat. Witching, Storms, and Lethargy don’t work on bosses.
Dread Beasts
Dread Beasts spawn on any flooring all through the whole thing of Eureka Orthos, indicated by their pink aura and a warning at the beginning of the ground. These are extremely harmful enemies which may and can wipe the get together. One of the best ways to take care of them is to make use of a Protomander of Storms and kill them immediately. Lethargy or Witching gained’t probably be sufficient to take them down. Killing them gives a 30 minute buff, in order that they’re well worth the effort to kill.
There are three doable spawns, every giving a unique buff upon defeat:
- Lamia Queen: Grants Regen upon dying.
- Meracydia Clone: 10% injury up upon killing.
- Demi Cochma: 10% injury discount.
Eureka Orthos Flooring 1-10
It warns you if an enemy assaults you whereas in Gpose, as I realized taking this shot. Screenshot by PC Invasion
The primary ten flooring are themed like the primary space of Labyrinth of the Ancients and filled with voidsent. However simply because it’s the primary ten doesn’t go away room to let down your guard. There are some nasty, party-wiping enemies about.
The enemies encountered on Flooring 1-10 are:
- Orthos Imp: Not a really threatening enemy. Its solely assault is Void Blizzard with no different strikes to talk of.
- Orthos Succubus: Hits you with Blood Sword, which absorbs your HP and heals it. In any other case it merely auto assaults. Not a giant risk, but it surely does patrol the realm, making it more likely to assault you in the course of one other pull. Kill it rapidly to mitigate its therapeutic.
- Orthos Dahak: This enemy has extra to it than meets the attention. Whereas it principally auto assaults, its triangular AoE assault, The Look, offers a heavy quantity of harm that may instakill non-tank courses. Don’t get caught in its AoE.
- Orthoiron Claw: Makes use of a triangular AoE referred to as The Hand, which knocks the participant again and offers a heavy quantity of harm that dangers dying if already injured. Proceed with warning.
Past Flooring Three
- Orthos Grenade: The one most harmful enemy. It casts the round AoE ‘Massive Burst’, which has no warning till it’s about to go off. Should you’re caught in it, you’ll immediately die. Run away the second it begins casting or use Witching, Lethargy, or Storms.
- Orthos Demon: Makes use of Darkish Orb for traditional injury, then a slim triangle AoE referred to as Condemnation. It offers a heavy quantity of harm that dangers killing non-tanks.
- Orthos Vassagal: Makes use of Grim Destiny for traditional injury, then Grim Halo, a round AoE round it dealing heavy injury. Be ready to run away and are available again in when this occurs. It’s additionally a patroller, so be cautious.
- Orthos Behemoth: Makes use of Wild Horn, which isn’t a really heavy injury assault, however has knockback, however then it stands up and slowly begins to forged Ecliptic Meteor down beneath half well being. Kill it earlier than that goes off otherwise you’re all very lifeless.
- Orthos Bhoot: Casts Terror Contact, afflicting its goal with Illness for twenty seconds, lowering motion pace and HP gained from therapeutic magic. This impact might be Esuna’d away and the enemy has no different methods, however it’ll repeat forged.
- Orthos Water Sprite: Casts Water for traditional injury.
- Orthos Fachan: Casts Stone for traditional injury, then Dread Gaze. You should look away throughout Dread Gaze or be inflicted with 22 seconds of Paralysis that may fortunately be Esuna’d away. It additionally patrols.
- Undead Orthos Dragon: In contrast to its Palace of the Lifeless counterparts, these aren’t as life-threatening. They forged considered one of two doable AoEs: a round Poisonous Vomit or linear Dragon Breath, every inflicting an enormous chunk of harm and a stack of Poison afterward.
- Orthos Thanatos: Has a triangular AoE referred to as Iron Justice dealing a hefty chunk of harm.
Flooring 10 Boss: Gancanagh
Screenshot by PC Invasion
The overall recommendation for this boss boils right down to being prepared to maneuver. Lots. And take note of your environment.
You’ll discover there are a number of Mandragoras embedded into the ground. These are Pachypodium Mines. The boss regularly makes use of Authoritative Shriek, making a number of of them spark with purple lightning power. Keep away from standing close to any of them once they’re sparked. They explode and deal a Vulnerability stack if you happen to’re caught within the blast.
The boss can even use Mandrashock, a room-wide impact that lessens the additional you’re from its radius. As standard with these assaults, transfer to the furthest doable nook away.
One other variant of Authoritative Shriek will activate all the mines with a quantity 1-3 over every row of mines. This means the order wherein they detonate. Transfer to the 2 or three row, look ahead to the one row to blow up, then transfer there.
Transfer in accordance with these mechanics and whittle its HP right down to zero, then proceed on to the following set of flooring.
Eureka Orthos Flooring 11-20
Screenshot by PC Invasion
The following set of flooring have an overgrown and floral theme to the format and enemies.
- Orthos Keter: Makes use of the triangular Glass Punch AoE, which takes out an enormous chunk of well being. It additionally patrols.
- Nice Orthos Morbol: Hits goal with Vine Probe for a small chunk of harm, then makes use of its notorious triangular Unhealthy Breath AoE. Unhealthy Breath inflicts all caught within the blast with Paralysis, Silence, Heavy, Sluggish, Blind, and Nausea without delay. It doesn’t have any harmful assaults however Unhealthy Breath is all the time horrible to take care of.
- Orthos Spirulina: This enemy assaults and does nothing else.
- Orthos Netzach: Normal assaults adopted by a triangular AoE referred to as Creeping Hush. It does an enormous chunk of harm and inflicts a stack of Poison.
Flooring 13 past
- Orthos Belladonna: The primary risk on this enemy is its round AoE Shadow Burst, which particularly targets the participant and can kill if caught in it.
- Orthosoldier: Makes use of a Headspin round AoE, which offers heavy injury risking dying.
- Orthos Wooden Golem: Makes use of a Line AoE referred to as Ovation, which is able to in all probability instakill. Additionally patrols.
- Orthos Rafflesia: This enemy makes use of a circle AoE referred to as Gold Mud, which targets a celebration member no matter aggro. If it doesn’t outright kill you, it’ll positively poison.
- Orthosystem β: Casts a round AoE referred to as Gravity Subject in direction of a participant. It would in all probability kill you and inflict Heavy if it doesn’t.
- Orthos Sawtooth: This enemy has two AoEs; Disserver, a triangle AoE that may in all probability KO, and Imply Thrash, a triangle AoE from its tail. Imply Thrash gained’t kill you outright from full, but it surely does heavy injury.
- Orthohunter: Assaults you. Does nothing else.
- Orthos Groundskeeper: Makes use of a circle AoE referred to as Neck Splinter which does about half of your HP. Additionally a patroller.
Flooring Boss: Cloning Node
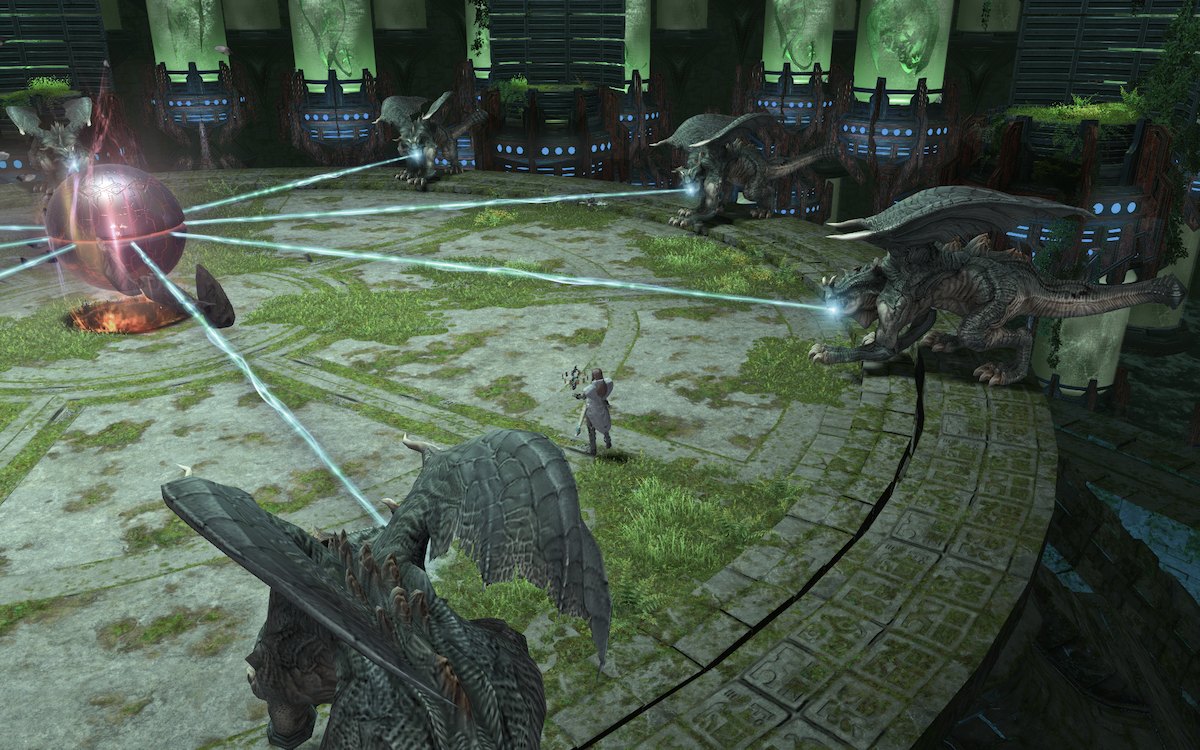
Screenshot by PC Invasion
This boss requires a whole lot of being attentive to the world to correctly keep away from its assaults. You’ll rapidly discover there are Cloned Defend Dragons within the background who will rapidly leap into the world to help the node. When the node casts Offensive Command, traces will go from the node to the dragons. Don’t stand within the path of any of them, as what follows is a fast triangle AoE instantly out from every dragon which supplies a Vulnerability stack if hit by. Order Relay will do the identical as Offensive Command, besides there will likely be a second spherical of AoEs after the preliminary. It’s a must to take note of which dragons don’t get a line, as they’ll be secure to run to after the primary spherical of AoEs.
That’s actually all there’s to this boss. Should you handle to study the place to face it doesn’t have every other methods to talk of.
Eureka Orthos Flooring 21-30
Screenshot by PC Invasion
These flooring are themed round deep Allagan ruins and include a whole lot of dragons and Allagan equipment. And the enemies are an entire new beast to take care of:
- Orthogiant: These items are nasty. Their Grand Sword transfer hits for a piece of EXP, however the AoE, Exhaust, will just about KO most courses.
- Orthodemolisher: This enemy doesn’t appear like a lot, however it’s. Its AoE, Assault Cannon, can instakill a whole lot of non-tank courses, but when that wasn’t dangerous sufficient, it at low hop casting a room-wide Self Destruct. Should you don’t kill it in time, say goodbye to the complete get together or run into the following room.
- Orthos Wyvern: This enemy makes use of Spiked Tail, which inflicts a stack of poison. It has no different mechanics, making it one of many much less harmful enemies, however the poison will hold stacking from Spiked Tail if not killed rapidly.
- Orthos Brobinyak: This enemy has one other look-away mechanic in Chilly Gaze, which paralyzes if not averted. Its different AoE, Physique Slam, kills if caught in it. Be ready to run away.
Past flooring 23
- Orthoknight: This enemy is the sequel to the grenade. When it begins casting Electromagnetism, run away, and quick. This can be a round AoE that pulls you in in direction of it adopted by a swing of its arms that may almost certainly kill you.
- Orthodroid: This enemy is what’s sometimes called a sniper in Deep Dungeons. Should you’re wherever inside its sight traces, even if you happen to’ve not aggroed it, it’ll goal you with its AoE Passive Infrared Steerage System, a lethal assault. Kill this stuff on sight or else you’ll hold coping with its AoE.
- Orthos Lesser Dragon: Makes use of Swinge, a triangular AoE with no warning that may kill you. On prime of that, it patrols.
- Orthoblue Dragon: Makes use of a line AoE referred to as Chilling Aspiration that if it doesn’t kill you’ll inflict 15 seconds of Frostbite.
- Orthos Vouivre: This factor principally assaults with Whipcrack for a gentle chunk of harm. Its larger drawback is its event room-wide AoE Bombination that offers a Vunerability stack, and it doesn’t need to be aggroed to make use of it. Watch out being in the identical room because it.
- Orthos Biast: Casts Electrify, a round AoE concentrating on a participant. It does a whole lot of injury, however normally not sufficient to kill from full well being.
- Orthos Vanara: Makes use of Scythe Tail, a triangular AoE that has no warning. If it doesn’t outright kill you the assault will stun. Additionally patrols.
- Orthokaliya: Makes use of a triangular AoE referred to as Nerve Gasoline, which is able to in all probability kill you.
- Orthoshelled Dragon: First it makes use of Diamondback on itself, lowering injury taken, then a round AoE referred to as Tortoisestomp which is able to in all probability kill you. Undoubtedly attempt to combat this stuff alone.
Flooring 30 Boss: Cloned Tiamat
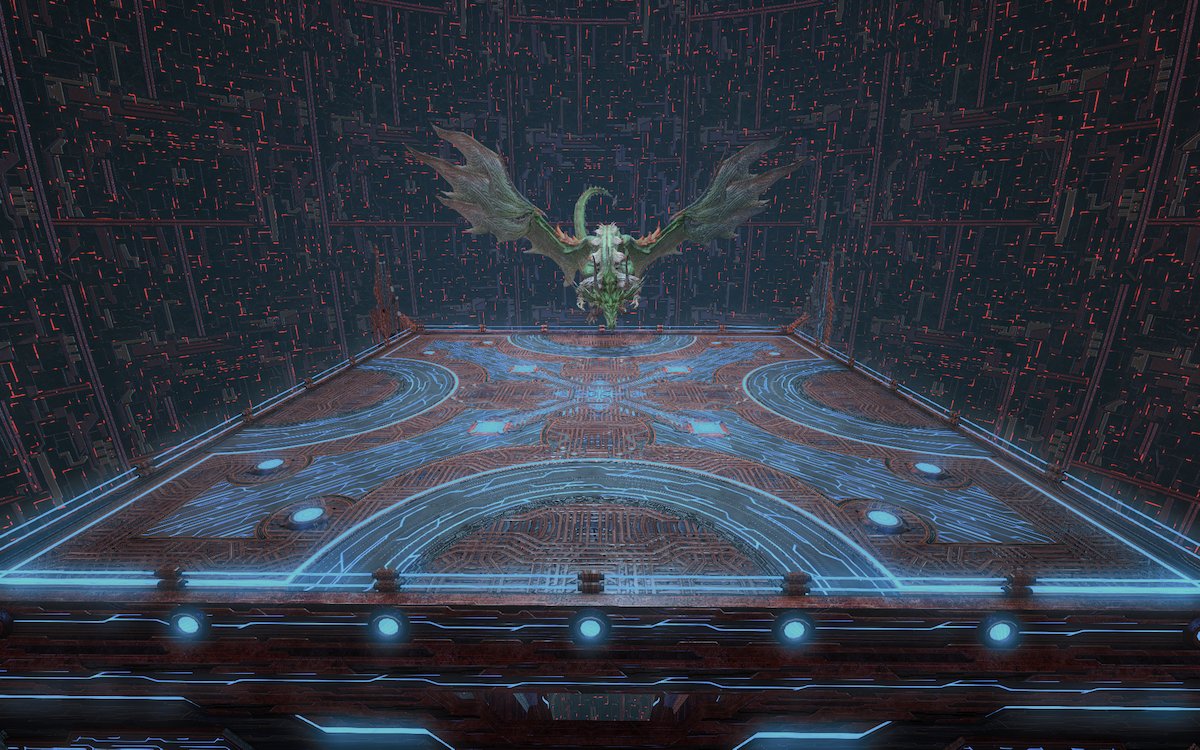
Screenshot by PC Invasiom
This boss is, to place it merely, a little bit of a nightmare if you happen to don’t know her mechanics. There’s as soon as extra a whole lot of motion but in addition untelegraphed AoEs to look out for.
- Creature of Darkness: Tiamat creates a number of Darkish Wanderers in entrance of her which slowly transfer throughout the platform. Search for the hole and stand there as they go. One other variant has them come from the edges. Stand between them once more, after which be prepared to maneuver to face between the gaps on the opposite aspect, as they don’t match.
- Darkish Wyrmwing: Stand within the center. That is an AoE coming from each her wings that may go away a Vulnerability if hit.
- Darkish Megaflare: A bunch of round AoEs will fill the platform a number of instances. Be prepared to maneuver out of those and rapidly. The Darkish Wanderers can even be transferring round, so it is advisable keep away from each.
- Whei Morn: One participant will likely be focused with a circle with a number of arrows beneath them as they transfer. This assault will observe in succession on their path, creating Darkish Wanderers with every blast, so keep away from the realm the participant was simply in.
- Darkish Wyrmtail: Stand on the edges, this AoE hits within the middle.
That is all she will be able to do, so when you handle to whittle down her HP, you’ve accomplished it! Flooring 30 is cleared! Once you’re outdoors, you’ve gotten a brand new quest to choose as much as unlock some story and the problem stage flooring of Eureka Orthos. Could the Twelve be with you if you happen to resolve to try past flooring 30.